NEXSMART™ Guides - Smart Tracker
Set up
1Download and open the “SMART LIFE” app

2In the upper right corner, click the plus, then “Add Device”

3This screen will appear. The area in red indicates that your phone is searching for the device.

4On your NEXSMART™ SMART TRACKER, press and hold the button for around 3 seconds until you hear a sound from the device.

5Your device should appear on your phone. A small symbol will identify it, then press the “Add” button.

6Your tracker will be added, this could take a moment. When succesful click the “Done” button.

7Your NEXSMART™ SMART TRACKER is now ready to use and fully connected to your phone. Press the “…” button if you want to enter the advanced settings. Here you can change the name and logo of the device.

Use
1Open the ”Smart Life” app on your phone.

2 Now you will see a list of your devices. In this case a tracker with the name of “Keys” can be seen. Click this area to get into your device.

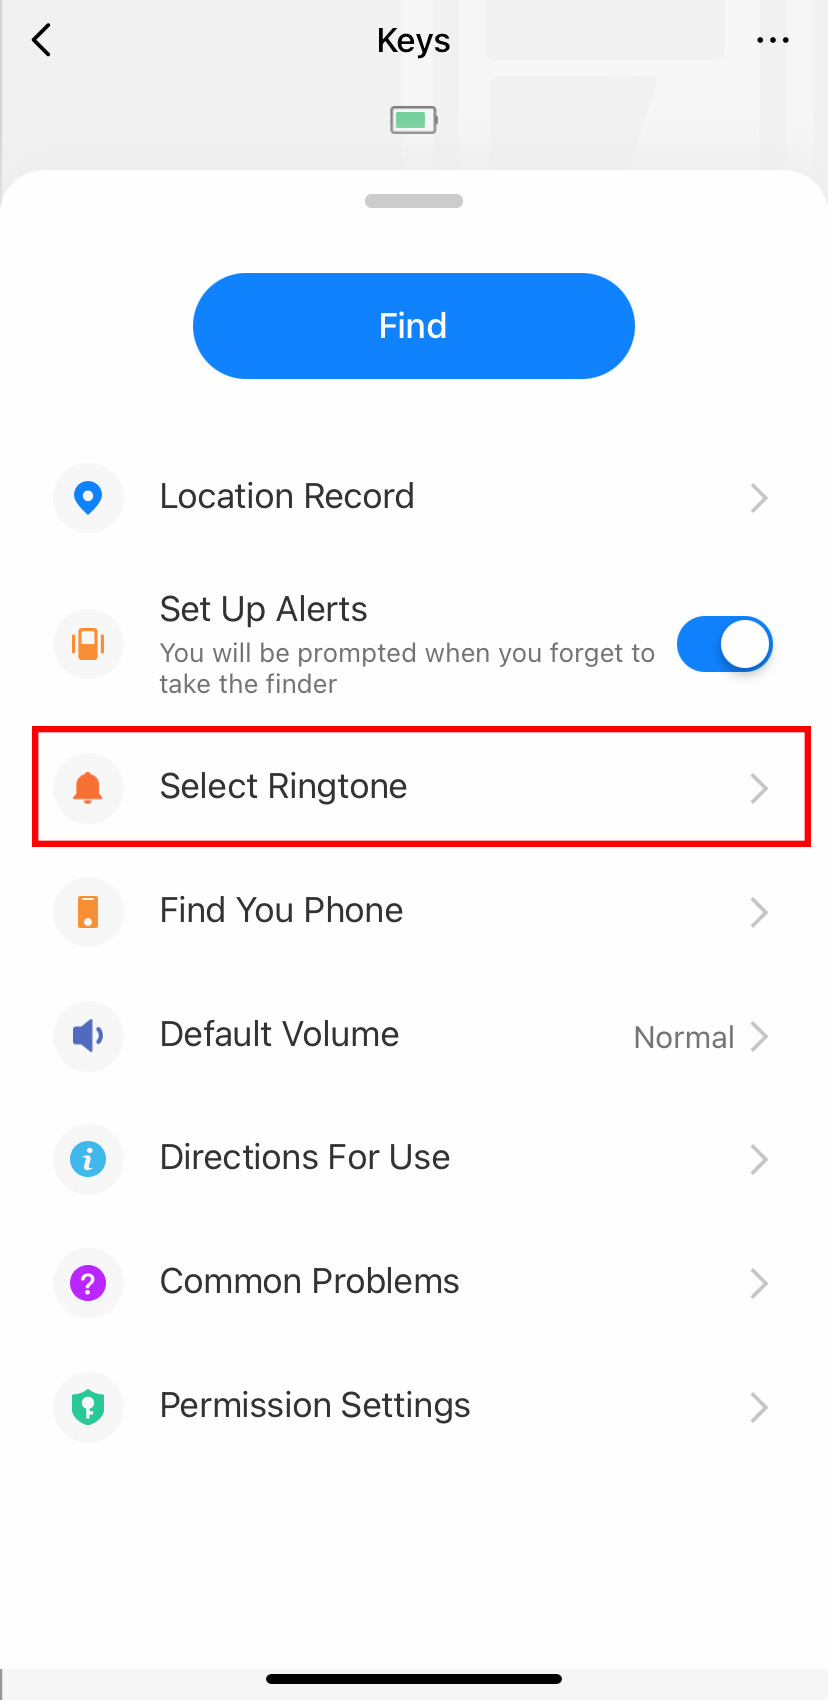
3 This is the main hub for your NEXSMART™ SMART TRACKER. You can see the status of your device. Press the “Find” button to make the tracker’s alarm go off. You can also press the “Location Record” button to see the history of your device on a map and on list form.

4 Hold and drag the grey bar up to see the full menu for the device.

5 The tracker will alert you if your phone gets out of range of the device. If you do not wish to be disturbed by this, press the “Set Up Alerts” button.

6 The sound that will play can be customized if you press the “Select Ringtone” button.

7 In this menu, you can select and listen to the different ringtones. The blue checkmark indicates the current ringtone.

8 If you press the “Default Volume” button you can select how loud the sound will be. You can also see the current setting.

9 In this menu the blue checkmark will indicate the current setting. Press the option that you prefer.

10 In the main menu, you can always see the battery status of your tracker.

